High-pass and low-pass filters control how different parts of the frequency spectrum contribute to an audio signal. Their operation is straightforward, but the way they shape a recording has important consequences for tonal balance, instrument separation, and the overall spectral character of a mix.
A high-pass filter (HPF) attenuates frequencies below its cutoff frequency while allowing higher frequencies to pass. A low-pass filter (LPF) does the opposite, attenuating frequencies above the cutoff while preserving the lower portion of the spectrum. Neither filter creates an absolute boundary: frequencies around the cutoff are affected according to the filter’s slope and response characteristics.
The distinction matters when cleaning up individual tracks, controlling frequency overlap between instruments, or shaping the bandwidth of a sound. Understanding how HPF and LPF behave makes it easier to choose appropriate cutoff frequencies and slopes without removing useful musical information or introducing unnecessary tonal changes.
What Is a High-Pass Filter (HPF)?
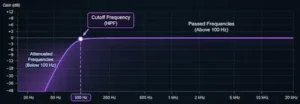 A high-pass filter (HPF) attenuates frequencies below a defined cutoff frequency while allowing higher frequencies to pass with progressively less attenuation. In mixing, its primary role is to control unwanted low-frequency energy that contributes little to the intended sound but can consume headroom, mask other sources, or complicate low-end balance.
Typical examples include subsonic rumble from microphone stands, handling noise, HVAC systems, and structural vibrations. Close-miked vocals may also exhibit proximity effect, which increases low-frequency response as the performer moves closer to a directional microphone. An HPF can help control this buildup, although the appropriate cutoff depends on the voice, microphone, recording technique, and desired tonal balance.
The term high-pass refers to the frequencies the filter allows to pass, not the frequencies it attenuates. This distinction is important when selecting the correct filter during mixing.
How Does a High-Pass Filter Work?
An HPF progressively attenuates frequencies below its cutoff point. The rate of attenuation is determined by the filter slope, while the actual response depends on the filter design and topology.
For example, a high-pass filter set to 100 Hz does not completely remove everything below 100 Hz or leave everything above it untouched. Instead, attenuation increases as frequency moves farther below the cutoff region. Frequencies sufficiently above the cutoff approach the filter’s passband response, while those near the transition point may still experience measurable attenuation.
The cutoff frequency is therefore a reference point within the filter’s response, not an absolute dividing line. Its precise definition can vary with filter design and the convention used to specify the response.
Filter slope, expressed in decibels per octave (dB/oct), describes how rapidly attenuation increases beyond the transition region. A steeper slope produces stronger attenuation over a narrower frequency range, while a gentler slope creates a more gradual transition.
Common Applications of High-Pass Filters
- Vocals: Reducing subsonic rumble, handling noise, and excessive proximity-related low-frequency buildup without unnecessarily thinning the fundamental range of the voice.
- Electric guitars: Controlling low-frequency energy that overlaps with bass guitar and kick drum, particularly when the guitar part does not need substantial low-end extension.
- Acoustic guitars: Reducing handling noise, stand vibrations, and excessive low-frequency buildup while retaining the instrument’s body and resonance.
- Drum overheads: Controlling low-frequency spill from kick drums, toms, and room resonances when those elements are already represented by close microphones.
- Synthesizers: Removing unnecessary low-frequency content from pads, leads, and other parts to reduce overlap with dedicated bass elements.
- Ambient and field recordings: Attenuating traffic rumble, ventilation noise, mechanical vibrations, and other unwanted low-frequency components.
High-pass filtering is not automatically beneficial simply because a track contains low-frequency energy. Some of that energy may contribute to the instrument’s fundamental tone, weight, or natural resonance. Setting the cutoff too high can weaken the source, while an unnecessarily steep slope can alter its tonal and phase characteristics more than the mix requires. The decision should be based on the actual spectral content, the instrument’s role, and the effect of filtering in the full arrangement.
Is Your Mix Balanced Across the Frequency Spectrum?
Controlling low-end buildup and excessive high-frequency content is only part of achieving a well-balanced mix. The relationship between bass, midrange, and high-frequency detail also determines how clearly instruments translate across different playback systems. If you are unsure whether your mix has the right tonal balance, transient definition, and overall spectral consistency, let a mastering engineer evaluate it. Upload up to 40 seconds of your mix and receive a free mastering demo to hear how professional mastering may affect its overall presentation.
Get Your Free Mastering Demo →
What Is a Low-Pass Filter (LPF)?
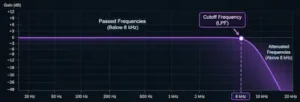 A low-pass filter (LPF) attenuates frequencies above a defined cutoff frequency while allowing lower frequencies to pass with progressively less attenuation. In audio production, it is used to control excessive high-frequency content, reduce unwanted spectral detail, and shape the bandwidth of individual tracks or entire signals.
Typical applications include reducing high-frequency hiss, controlling the upper-frequency content of distorted guitar recordings, and softening sounds that occupy too much space in the mix. Low-pass filtering can also serve a deliberate tonal purpose: reducing high-frequency energy changes the perceived brightness of a source and can make it sound darker or less present.
As with an HPF, the cutoff frequency does not establish an absolute boundary. Frequencies around the transition region are progressively attenuated according to the filter’s response and selected slope.
How Does a Low-Pass Filter Work?
Consider an LPF set to 8 kHz. Frequencies sufficiently below the cutoff approach the filter’s passband response, while frequencies above the transition region experience progressively greater attenuation. The rate at which this attenuation increases depends on the filter slope.
This makes an LPF useful when the upper portion of a signal needs to be controlled without substantially changing its low- and mid-frequency content. However, the audible result depends on where the cutoff is placed relative to the source’s important harmonics, transients, and spectral detail.
Several parameters influence the response: cutoff frequency, filter slope, resonance, and filter topology. Resonance can introduce a peak around the cutoff region, changing the tonal character near the transition point rather than simply making the entire upper spectrum quieter.
Common Applications of Low-Pass Filters
- Electric guitars: Controlling excessive high-frequency fizz, amplifier noise, and abrasive upper harmonics, particularly in heavily distorted recordings.
- Vocals: Reducing unwanted high-frequency noise or deliberately softening a vocal when its upper-frequency presence is excessive.
- Drum samples: Shaping the high-frequency character of kick drums, percussion, and other samples when their upper harmonics or transient detail need to be controlled.
- Synthesizers: Creating darker timbres, reducing harmonic content, and shaping evolving tones through subtractive synthesis.
- Background elements: Reducing high-frequency detail to help create a sense of distance and establish depth within a mix.
- Sample editing: Controlling excessive high-frequency content in loops, recordings, and sound effects, including unwanted hiss and other broadband noise.
In sound design, an LPF can also be used as a time-varying effect. Automating the cutoff frequency creates filter sweeps and evolving tonal transitions. Lowering the cutoff progressively reduces upper-frequency energy, while opening the filter restores brightness and harmonic detail. The result depends on the source material, filter response, and automation curve.
High-Pass Filter vs Low-Pass Filter: Key Differences
The distinction between a high-pass filter (HPF) and a low-pass filter (LPF) comes down to which part of the frequency spectrum each one attenuates. An HPF reduces low-frequency content below its cutoff region, while an LPF reduces high-frequency content above its cutoff region. Both can be used for corrective processing and tonal shaping, but their effects on a signal are fundamentally opposite.
| Characteristic | High-Pass Filter (HPF) | Low-Pass Filter (LPF) |
|---|---|---|
| Attenuated frequency range | Below the cutoff region | Above the cutoff region |
| Passband | Higher frequencies | Lower frequencies |
| Typical corrective use | Reducing subsonic rumble, handling noise, and unwanted low-frequency buildup | Controlling excessive brightness, high-frequency noise, and unwanted upper harmonics |
| Typical mixing applications | Vocal cleanup, guitar filtering, and managing low-frequency overlap | Controlling guitar fizz, shaping percussion, and reducing excessive high-frequency detail |
| Creative applications | Reducing low-end weight or emphasizing the upper portion of a sound | Creating darker timbres, softer textures, and a sense of distance |
| Common abbreviation | HPF | LPF |
Neither filter is inherently better or more useful than the other. They address different spectral problems and can be combined on the same signal when both ends of its frequency range need to be controlled. The important decision is not which filter to use, but which part of the spectrum needs attenuation and how much processing the source can tolerate without losing useful musical information.
HPF vs LPF: Visualizing the Frequency Response
A filter’s frequency response curve shows how its gain changes across the frequency spectrum. It provides a useful way to compare high-pass and low-pass behavior, particularly when evaluating cutoff frequency, attenuation rate, and the width of the transition region.
An HPF has an attenuated low-frequency region followed by a rising response toward the passband. As frequency increases beyond the transition region, attenuation progressively decreases until the signal reaches the filter’s passband response.
An LPF follows the opposite pattern. Its response remains relatively flat in the low-frequency passband before declining through the transition region as frequency increases beyond the cutoff.
The slope determines how rapidly the response changes around the cutoff region. A gentle slope spreads attenuation over a wider frequency range, while a steeper slope produces a more abrupt transition. This difference affects how much adjacent spectral content is retained and how selectively the filter attenuates frequencies outside its passband.
However, a magnitude response curve describes only one aspect of filter behavior. It does not show phase shift, phase rotation, or the filter’s time-domain response. Depending on the filter topology and implementation, these characteristics can influence transient shape, waveform relationships, and the interaction between processed and unprocessed signals. Resonance can also alter the magnitude response by introducing a peak around the cutoff region. For critical mixing decisions, the response curve should therefore be considered alongside actual listening and, where relevant, phase-response analysis.
Understanding Filter Slopes: 12, 24, 36, 48 and 96 dB/Octave
Filter slope describes how rapidly a filter attenuates frequencies beyond its cutoff region. It is expressed in decibels per octave (dB/oct), indicating the change in attenuation for each doubling or halving of frequency within the filter’s stopband. A higher slope produces a steeper transition between the passband and the attenuated frequency range.
For example, a 12 dB/octave filter has a more gradual response than a 24 dB/octave filter. Increasing the slope to 48 dB/octave produces substantially stronger attenuation over a shorter frequency range, while 96 dB/octave provides an extremely steep transition. The practical difference is not simply how much unwanted content is removed, but how narrowly the filter can define the transition between retained and attenuated frequencies.
The following table summarizes common filter slopes and their typical applications in audio production:
| Filter Slope | Characteristics | Typical Applications |
|---|---|---|
| 12 dB/oct | Gradual attenuation with a relatively broad transition region | Subtle tonal shaping and natural low-end or high-end cleanup |
| 24 dB/oct | More pronounced attenuation with a moderately steep transition | General-purpose filtering and reducing frequency overlap between instruments |
| 36 dB/oct | Steep attenuation over a narrower frequency range | More aggressive removal of unwanted low- or high-frequency content |
| 48 dB/oct | Very steep transition with strong attenuation beyond the cutoff region | More selective frequency control and corrective filtering |
| 96 dB/oct | Extremely steep transition with very rapid attenuation | Specialized filtering where strong separation between passband and stopband is required |
A steeper slope is not automatically a better choice. In conventional minimum-phase filter designs, increasing the slope generally produces more pronounced phase rotation around the transition region. Depending on the filter implementation, this can affect the relationship between the filtered signal and other tracks, particularly when multiple microphones capture the same source or when parallel processing is used.
Very steep filtering can also produce audible changes in transient character and tonal balance. These effects depend on the filter topology, cutoff frequency, resonance, and source material rather than slope alone.
For routine mixing, moderate slopes often provide sufficient attenuation without unnecessarily altering the surrounding frequency range. Steeper slopes are more appropriate when unwanted spectral content needs to be suppressed over a relatively narrow transition region. The final choice should be based on the audible result and the filter’s behavior in the context of the entire mix.
What Is a Brickwall Filter?
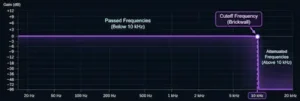 A Brickwall filter is an extremely steep high-pass or low-pass filter designed to attenuate frequencies beyond a defined cutoff region as rapidly as possible. Its defining characteristic is a narrow transition between the passband and stopband, allowing substantially stronger attenuation over a smaller frequency interval than gentler filter slopes.
In practical terms, a Brickwall response provides more aggressive frequency separation than conventional slopes such as 12 or 24 dB/oct. This can be useful when unwanted low- or high-frequency content needs to be suppressed without extending the transition region unnecessarily into adjacent frequencies.
However, steep filtering introduces engineering trade-offs. In minimum-phase implementations, stronger attenuation is generally accompanied by more pronounced phase rotation around the transition region. Other filter designs may exhibit different phase and time-domain behavior. Depending on the implementation, steep filtering can also produce ringing or alter transient characteristics. These effects should be evaluated in relation to the source material and the intended processing objective.
Brickwall filtering is therefore a specialized option rather than a default choice for routine mixing. It is most useful when conventional slopes do not provide sufficient attenuation, but its suitability depends on the filter topology, cutoff frequency, and interaction with other signals in the mix.
Using HPF and LPF Together in Audio Mixing
High-pass and low-pass filters can be combined to control the usable frequency range of an individual track. An HPF reduces low-frequency content, while an LPF attenuates the upper spectrum. Used together, they can limit unnecessary bandwidth, reduce spectral overlap, and help individual sources occupy more defined positions in a mix. Ultimately, these adjustments should support the overall frequency balance of the mix, rather than simply reduce bandwidth on individual tracks.
Consider an electric guitar with excessive low-frequency energy competing with the bass guitar and kick drum, along with abrasive upper harmonics from a distorted amplifier. An HPF can reduce the unwanted low-end contribution, while an LPF can control excessive high-frequency content. The result is a more focused spectral range that may require less corrective EQ elsewhere in the mix.
However, bandwidth reduction should serve a specific mixing objective. Removing too much information from either end of the spectrum can make an instrument sound unnaturally thin, dull, or disconnected from the arrangement. The goal is to control problematic frequency content without sacrificing the characteristics that define the source.
Practical Examples of HPF and LPF Settings
The following ranges are approximate starting points for common mixing situations, not recommended settings for every recording. The appropriate cutoff depends on the source’s fundamental frequencies, harmonic content, recording technique, arrangement, and desired tonal balance. LPF settings are particularly source-dependent because the useful upper-frequency range can vary considerably between recordings.
| Audio Source | HPF Starting Point | LPF Starting Point |
|---|---|---|
| Lead vocals | 70–120 Hz | Usually unnecessary unless there is excessive upper-frequency noise or brightness |
| Electric guitar | 70–120 Hz | 7–12 kHz |
| Acoustic guitar | 70–100 Hz | 10–16 kHz |
| Snare drum | 70–120 Hz | 10–16 kHz |
| Overheads | 80–200 Hz | Depends on cymbal detail, room sound, and desired top-end response |
| Hi-hats | 200–500 Hz | Usually unnecessary unless excessive high-frequency content needs to be controlled |
| Synthesizers | Depends on the sound’s low-frequency content and arrangement | Depends on harmonic structure and desired tonal character |
These ranges require particular care when applied to vocals. A naturally thin voice may lose important body when high-pass filtered too aggressively, while a close-miked vocal with pronounced proximity effect may benefit from more substantial low-frequency attenuation. The appropriate setting depends on the actual recording rather than vocal classification alone.
The same principle applies to guitars, drums, and synthesizers. A frequency that appears unnecessary in solo may contribute to the instrument’s weight, attack, or tonal identity within the arrangement. Evaluate both filters in the full mix, compare the processed and unprocessed signals at matched levels, and adjust the cutoff frequencies until the unwanted energy is controlled without compromising the source.
Choosing the Right Filter for Different Mixing Problems
When choosing between a high-pass and low-pass filter, start by identifying which part of the frequency spectrum needs to be controlled. The right choice depends on the nature of the unwanted content and how it affects the source within the mix.
When to Use a High-Pass Filter
- The recording contains unwanted sub-bass or low-frequency rumble.
- An instrument occupies too much low-frequency space in the mix.
- Microphone handling noise or environmental vibrations are audible.
- Low-frequency energy from multiple instruments creates unnecessary buildup.
- A sound needs to be made thinner or its low-frequency contribution reduced.
When to Use a Low-Pass Filter
- A recording contains excessive high-frequency noise or hiss.
- A distorted guitar has unpleasant high-frequency fizz.
- A sound needs to become darker or less prominent in the upper frequency range.
- A synthesizer requires tonal shaping through subtractive filtering.
- Background elements need less high-frequency detail to help create a sense of distance.
In some situations, neither filter is the most appropriate solution. If a specific frequency range is too prominent while the surrounding spectrum needs to remain largely intact, a parametric EQ with a narrow bell-shaped cut may provide more precise control.
If a mix still sounds muddy despite filtering individual tracks, the problem may come from overlapping instruments or arrangement density rather than one specific frequency range. Our guide explains how to diagnose and fix a muddy mix without relying on unnecessary processing.
The goal is not to remove as much frequency content as possible. It is to make the smallest effective adjustment that improves tonal balance and clarity without compromising the character of the source.
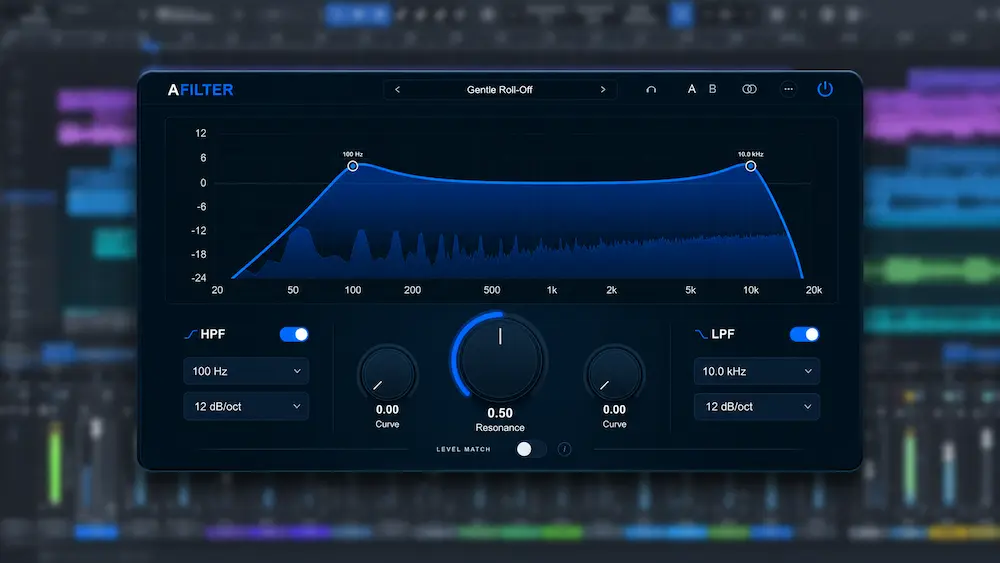
Practical HPF and LPF Processing with AFILTER
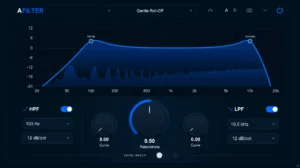 Working with high-pass and low-pass filters requires control over cutoff frequency, slope, and resonance. These parameters determine how much of the signal is attenuated and how the filter behaves around the cutoff frequency.
AFILTER is a free audio filter plugin developed by AREFYEV STUDIO for high-pass and low-pass processing. It features independent HPF and LPF sections, allowing users to shape both ends of the frequency spectrum within a single plugin.
AFILTER offers multiple slope options, including 12, 24, 36, 48, and 96 dB/oct, along with a Brickwall mode for extremely steep attenuation. This range supports everything from gradual tonal shaping to highly selective filtering.
Additional controls provide more options for evaluating and refining the filter response:
- Independent HPF and LPF: Adjust low-frequency and high-frequency attenuation separately.
- Adjustable Resonance: Shape the response around the cutoff frequency and emphasize the transition region when needed.
- Multiple filter slopes: Select gradual or steep attenuation according to the source material and processing objective.
- Brickwall mode: Apply extremely steep filtering for specialized processing tasks.
- Delta monitoring: Listen to the difference signal to identify which parts of the audio are being affected by the processing.
- Level Match: Compare processed and unprocessed signals at matched levels, reducing loudness-related bias during evaluation.
For example, when cleaning up an electric guitar, start with a moderate HPF slope and gradually raise the cutoff frequency until unnecessary low-frequency energy is controlled. If the recording also contains excessive high-frequency fizz, adjust the LPF to reduce it. Delta monitoring helps identify the content affected by the filters, while Level Match makes it easier to judge the tonal changes without being misled by differences in loudness.
AFILTER is available in VST3 and CLAP formats, as well as an optional standalone application. The plugin supports 64-bit Windows systems.
If you need a dedicated tool for high-pass and low-pass processing, explore AFILTER.
Common Mistakes When Using High-Pass and Low-Pass Filters
Although filtering is a relatively straightforward form of audio processing, several common mistakes can compromise tonal balance and reduce the effectiveness of a mix.
1. Applying High-Pass Filters to Every Track
High-pass filtering is often recommended as a way to clean up a mix, but applying it indiscriminately can remove useful low-frequency information. Some instruments rely on their natural body, resonance, and fundamental frequencies to sound full and convincing. Filtering decisions should be based on the actual content and role of each recording, not on a universal rule.
2. Setting the Cutoff Frequency Too High
Raising the HPF cutoff too far can make vocals, guitars, and other instruments sound thin or weak. Similarly, setting an LPF cutoff too low can remove important articulation, transient detail, and high-frequency presence. Always assess how the cutoff affects the source’s overall tonal character, not just the frequencies being removed.
3. Always Choosing the Steepest Slope
A 96 dB/oct filter may seem more effective than a 12 dB/oct filter because it attenuates frequencies beyond the cutoff more rapidly. However, stronger attenuation does not automatically produce a better result. Steeper slopes can produce more pronounced phase changes around the transition region, depending on the filter design. Choose the slope that provides sufficient attenuation without introducing unnecessary changes to the sound.
4. Ignoring Filter Resonance
Filter resonance can create a peak around the cutoff frequency, emphasizing part of the spectrum rather than simply attenuating frequencies beyond it. Depending on the filter design and resonance setting, this emphasis may noticeably alter the tonal balance. Resonance can be useful for creative sound shaping, but excessive emphasis may introduce unwanted coloration.
5. Evaluating Filters Only in Solo
An instrument that sounds impressive in isolation may not work well in the full arrangement. Filter settings should be evaluated both on the individual track and in the context of the entire mix. A change that seems subtle in solo can have a significant effect on the overall balance, while a sound that seems less impressive on its own may fit the arrangement more effectively.
Can You Use HPF and LPF During Mastering?
Yes. High-pass and low-pass filters can be used during mastering, but they require additional care because processing affects the entire mix rather than an individual instrument or track.
A mastering engineer may use a high-pass filter to reduce unwanted subsonic energy, mechanical rumble, or other low-frequency content that does not contribute meaningfully to the musical result. A low-pass filter may be appropriate when a master contains excessive high-frequency noise or unwanted upper-frequency content.
However, harshness in a master is not always caused by excessive high-frequency energy. If it appears after limiting or saturation, the underlying issue may involve transient behavior or added harmonics rather than a simple tonal imbalance. Our guide to diagnosing and controlling harsh highs in mastering explains how to distinguish between these problems.
In many cases, frequency problems are better addressed during mixing, where individual tracks can be processed independently. Mastering is not a substitute for correcting problems at their source, and it should not be expected to compensate for every frequency-related issue in the original production.
Final Thoughts: HPF vs LPF
High-pass and low-pass filters serve complementary purposes in audio production. An HPF attenuates frequencies below its cutoff region, making it useful for controlling unwanted low-frequency content. An LPF attenuates frequencies above its cutoff region, helping manage excessive brightness, noise, and upper-frequency detail.
Both filters are fundamental tools for mixing engineers, producers, and sound designers. Their effectiveness depends not only on the selected cutoff frequency but also on the filter slope, resonance, filter design, source material, and musical context.
The most reliable approach is to listen critically, make deliberate adjustments, and avoid filtering frequencies simply because they are present. Every processing decision should serve a specific purpose within the production.
Whether you are cleaning up vocal recordings, controlling unwanted guitar frequencies, shaping synthesizers, or refining the spectral balance of a mix, understanding HPF and LPF behavior will help you make more informed and consistent audio engineering decisions.

Yurii Ariefiev approaches audio filtering from an engineering perspective, where cutoff frequency, slope, and phase response must be considered together. Evaluating HPF and LPF processing requires more than identifying unwanted frequencies: the effect on transient detail, tonal balance, and the interaction between sources determines whether a filter improves the overall signal.
Enjoyed this review?
If you found it useful, you can support independent audio research with a coffee. ☕
Buy me a coffee