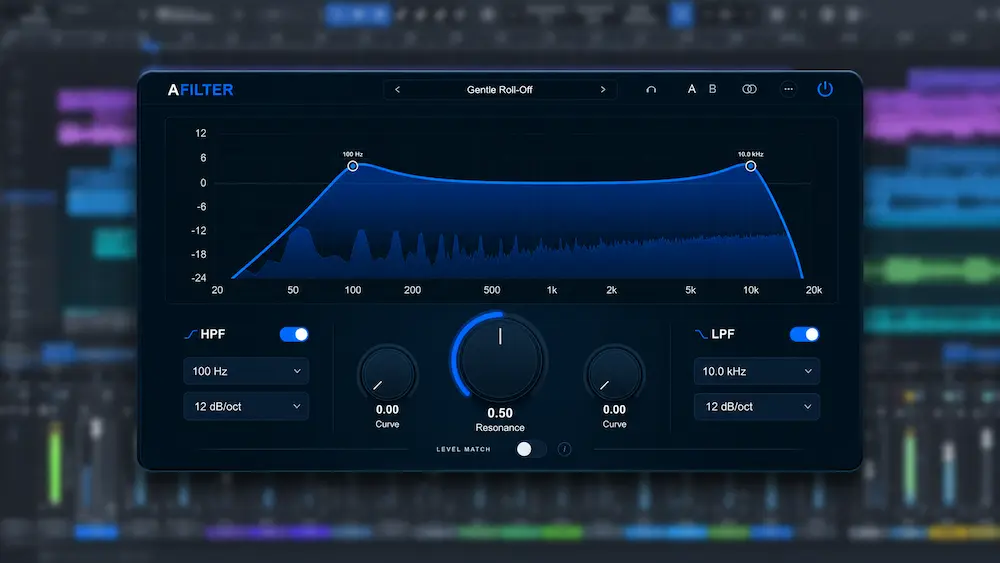
A high-pass filter (HPF), also known as a low-cut filter, attenuates frequencies below a selected cutoff region while preserving the higher-frequency content. In vocal mixing, it is commonly used to reduce microphone and handling noise, control excessive proximity effect, and remove unnecessary low-frequency energy before it accumulates in the mix.
The main challenge is choosing a cutoff frequency and slope that address the problem without compromising the voice. A cutoff set too low may leave unwanted rumble untouched, while one set too high can reduce fundamental frequencies and low-frequency harmonics that contribute to vocal weight and chest resonance. Steeper slopes provide stronger attenuation below the cutoff but can also introduce more pronounced phase shifts, depending on the filter design.
There is no universal HPF setting for vocals. The appropriate response depends on the singer’s range, microphone placement, recording conditions, and arrangement. Identify the source of the unwanted low-frequency energy, adjust the filter while monitoring the vocal, and evaluate the result in the context of the full mix.
Why Use a High-Pass Filter on Vocals?
 Vocal recordings often contain low-frequency energy that contributes little to the performance. Microphone stand vibrations, handling noise, room rumble, and air movement can introduce unwanted content below the useful range of the voice. At the same time, the lower harmonics and fundamental frequencies are essential to the vocal’s weight and tonal character. The distinction between these components determines how aggressively an HPF can be applied.
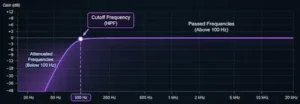
A high-pass filter attenuates frequencies below its cutoff region, with the amount of reduction increasing toward the lower end of the spectrum. Unlike a broadband gain adjustment, it targets a specific part of the frequency range while leaving frequencies above the transition region relatively unaffected.
In vocal mixing, an HPF is commonly used to address several types of low-frequency interference:
- Microphone and environmental rumble: Reducing low-frequency noise caused by stand vibrations, handling, ventilation, traffic, and other sources outside the vocal performance.
- Proximity effect: Controlling excessive bass buildup when a singer performs close to a directional microphone.
- Plosive energy: Attenuating some of the low-frequency impact produced by bursts of air on consonants such as P and B. Severe plosives usually require more targeted editing or processing.
- Low-end buildup: Removing unnecessary sub-bass energy from vocal layers that can accumulate when multiple tracks are combined.
- Compressor response: Reducing unwanted low-frequency energy before compression so that rumble or plosive transients are less likely to influence the compressor’s detector and gain reduction.
The last application depends on signal-chain placement. An HPF inserted before a compressor can change how the compressor responds to the vocal, whereas filtering after compression cannot prevent low-frequency energy from influencing the compressor earlier in the chain.
An HPF is not automatically beneficial simply because a vocal contains low-frequency energy. Fundamental frequencies and lower harmonics contribute to the perceived weight, warmth, and body of the voice. Excessive attenuation can make a vocal sound thin or disconnected from the arrangement.
The objective is to reduce low-frequency content that interferes with the recording while preserving the components that give the voice its natural character.
Low-Frequency Problems in Vocal Recordings
Before applying an HPF, identify the source and character of the unwanted low-frequency energy. Different problems require different solutions, and a high-pass filter is not always the most effective tool.
Microphone and Environmental Rumble
Low-frequency rumble can enter a recording through microphone stand vibrations, desk or floor movement, ventilation systems, nearby traffic, and other environmental sources.
This noise may be difficult to identify when listening to a vocal in isolation, particularly on monitoring systems with limited low-frequency extension. However, it can become more noticeable when multiple tracks are combined or when compression and other processing increase the audibility of quieter signal components.
A moderate high-pass filter can reduce this unwanted energy while preserving the audible body of the vocal, provided its cutoff is sufficiently below the voice’s useful low-frequency content.
If the rumble is severe, a steeper filter slope may provide stronger attenuation below the cutoff. However, filtering should not be the first response to every recording problem. Where possible, address the source through editing, clip gain, or corrective processing before applying more aggressive filtering.
Plosives and Air Movement
Plosives are bursts of air produced by consonants such as P and B. When directed toward the microphone capsule, these bursts can generate strong low-frequency transients that sound like thumps or pops.
An HPF can attenuate part of this energy, but it is rarely a complete solution for severe plosives. The transient may contain useful vocal information above the filter’s cutoff, so raising the cutoff until the pop becomes less audible can also remove low-frequency content from the entire performance.
For isolated plosives, clip gain, manual editing, or dedicated de-plosive processing usually provides more precise control. These methods allow you to reduce the problematic event without unnecessarily attenuating the low frequencies of every word.
Excessive Low-Frequency Energy
Some vocal recordings contain more low-frequency energy than the arrangement requires. This can result from microphone placement and proximity effect, the singer’s vocal characteristics, or the tonal balance of the recording chain.
When similar buildup affects several instruments rather than the vocal alone, the problem may be part of a broader muddy mix that requires identifying the source of the overlap before applying corrective EQ.
An HPF can help when the unwanted energy is concentrated near the bottom of the spectrum. However, if the problem lies higher in the low-midrange, a high-pass filter is unlikely to be the most appropriate solution. A parametric EQ allows you to target the problematic frequency range more precisely while preserving the fundamental frequencies and lower harmonics that contribute to the voice’s body.
A Balanced Mix Starts with the Right Low-End Control
A well-controlled vocal low end is only one part of a balanced mix. The challenge is preserving the voice’s natural weight and body while ensuring that unwanted rumble and excessive bass do not interfere with the overall tonal balance. Professional mastering considers the relationship between low frequencies, dynamics, clarity, and the rest of the arrangement without relying on unnecessary processing. You can upload up to 40 seconds of your mix for a free mastering demo and hear how it translates through a dedicated mastering process.
Submit your mix for a free mastering demo →
How to Control the Proximity Effect with a High-Pass Filter
The proximity effect is an increase in low-frequency response that occurs when a sound source moves closer to a directional microphone. It is most commonly associated with microphones using cardioid and other pressure-gradient polar patterns.
When a singer performs close to a directional microphone, the proximity effect can add bass weight to the recording. This can create a fuller, more intimate sound, but excessive buildup may make the vocal sound boomy or muddy.
A high-pass filter can reduce the lowest part of this additional bass energy. However, it is important to distinguish excessive proximity effect from the natural low-frequency character of the singer’s voice.
For example, a close-miked vocal may have considerably more low-frequency energy than the same voice recorded farther from the microphone. Removing too much of this energy can make the vocal sound thin and strip away some of the warmth and intimacy that made the original recording desirable.
A practical approach is to:
- Play a section where the proximity effect is most noticeable.
- Engage a high-pass filter with a moderate slope.
- Gradually raise the cutoff frequency until the excessive bass weight begins to decrease.
- Listen for the point at which the vocal starts losing its natural body and fullness.
- Lower the cutoff slightly to retain the desired vocal character while controlling the excessive low-frequency energy.
If no HPF setting provides a satisfactory balance, consider using a low-shelf filter or a broad, gentle EQ cut instead. These approaches can reduce excessive bass while preserving more of the lower frequency range than an aggressively adjusted high-pass filter.
The proximity effect is not inherently a recording defect. The additional low-frequency response can be an intentional part of the vocal sound. The goal is not to eliminate it, but to control it when it interferes with the tonal balance of the mix.
High-Pass Filter Settings for Vocals
There is no universal cutoff frequency for vocal recordings. The appropriate setting depends on the singer’s range and register, the lowest notes in the performance, microphone characteristics, recording distance, room noise, and the arrangement.
A practical starting point is to set the cutoff low enough to preserve the voice’s fundamental frequencies and lower harmonics, then gradually raise it while listening for unwanted low-frequency energy. Remember that the cutoff frequency is not a brickwall boundary: the amount of attenuation at and below it depends on the filter design and slope.
Suggested Starting Ranges
The following values are approximate starting points for testing, not fixed presets or rules based on vocal gender:
| Vocal Type or Situation | Starting Cutoff Range | What to Listen For |
|---|---|---|
| Low male voice | 40–80 Hz | Preserve chest resonance and the lowest sung notes. |
| Mid-range male voice | 60–100 Hz | Control rumble without unnecessarily reducing vocal weight. |
| Higher male voice | 70–120 Hz | Remove unnecessary low-frequency energy while retaining natural body. |
| Female lead vocal | 80–150 Hz | Control rumble and excessive bass without thinning the voice. |
| Backing vocals and doubles | 100–180 Hz | Reduce unnecessary low-frequency overlap between vocal layers. |
| Spoken voice | 70–120 Hz | Remove rumble while maintaining a natural speaking tone. |
These ranges overlap intentionally and should not be treated as presets determined by vocal category. A low male voice may require a lower cutoff than a higher male voice, while a female singer with a rich lower register may need more low-frequency preservation than a lighter-sounding performance.
The actual notes in the recording are more useful than assumptions based on the singer’s gender or vocal classification. Pay particular attention to the lowest sustained notes and their fundamental frequencies. Also consider the filter’s slope: a steeper filter attenuates frequencies below the cutoff more rapidly, while a gentler slope produces a more gradual transition.
How to Find the Correct Cutoff Frequency
A reliable method is to begin with a low cutoff and gradually move it upward.
For example, if the vocal contains unwanted rumble, start around 40–50 Hz and slowly raise the cutoff. Initially, the change may be barely noticeable. As the filter begins to affect frequencies that contribute to the voice’s weight and body, the vocal may start to sound thinner or less full.
When this happens, lower the cutoff until the natural body of the voice is restored while the unwanted low-frequency energy remains controlled.
Do not evaluate the result only in solo mode. A vocal that sounds slightly fuller in isolation may contribute unnecessary low-frequency energy to the full arrangement. This is why frequency balance in the mix must be evaluated through the relationships between tracks rather than individual sounds alone. Conversely, a vocal that sounds clean and controlled on its own may become too thin when heard alongside the bass and kick drum.
Use both listening conditions:
- In solo: Check whether the vocal retains its natural tone, weight, and resonance.
- In the full mix: Check whether the low end is controlled and the vocal remains balanced with the kick drum, bass, and other instruments.
Choosing the Right High-Pass Filter Slope
The cutoff frequency determines the point around which the filter begins attenuating lower frequencies. The slope determines how rapidly the attenuation increases below that region.
Filter slopes are expressed in decibels per octave (dB/oct). A higher value produces a steeper roll-off, resulting in greater attenuation below the cutoff frequency.
When processing vocals, the slope is just as important as the cutoff frequency. Two filters set to the same cutoff can produce noticeably different tonal results when their slopes differ.
| Filter Slope | Behavior | Typical Application |
|---|---|---|
| 6 dB/oct | Very gradual attenuation | Subtle low-frequency cleanup and gentle tonal shaping. |
| 12 dB/oct | Moderate attenuation | General-purpose vocal filtering. |
| 18 dB/oct | Steeper attenuation | More pronounced reduction of unwanted low-frequency energy. |
| 24 dB/oct | Strong attenuation | More aggressive rumble control when a gentler slope is insufficient. |
| 36–48 dB/oct | Very steep attenuation | Specialized filtering when strong rejection below the cutoff is required. |
When to Use a Gentle Slope
A gentle 6 or 12 dB/oct slope is often a useful starting point for lead vocals. It attenuates low-frequency content gradually, allowing a smoother transition around the cutoff region.
This approach is useful when a recording contains mild rumble or excessive bass but does not require aggressive filtering.
A gentle slope can also be preferable for singers with naturally deep voices or when the low-frequency character is an important part of the performance. It allows unwanted energy to be reduced without imposing a steep transition on the vocal’s lower spectrum.
When to Use a Steeper Slope
An 18 or 24 dB/oct slope provides stronger attenuation below the cutoff and can be useful when unwanted low-frequency content extends well below the useful range of the vocal.
For example, a recording made in a noisy environment may contain substantial mechanical or environmental rumble. A steeper filter can reduce this energy more rapidly without requiring the cutoff frequency to be raised unnecessarily.
However, a steeper slope is not automatically more transparent. Its effect on phase response depends on the filter architecture. In conventional minimum-phase designs, steeper filtering generally produces more complex phase rotation around the cutoff region.
Slopes of 36 or 48 dB/oct are best treated as specialized options rather than default settings for every vocal track. Use them when the additional attenuation is necessary and does not compromise the desired sound.
Does Filter Slope Affect Phase?
Yes, in conventional minimum-phase filters, a high-pass filter introduces frequency-dependent phase shifts around its cutoff region. The amount and distribution of phase rotation depend on the filter’s architecture, order, and slope.
Phase shift is not automatically a problem or an indication of poor sound quality. However, it is worth checking when filtering multiple vocal microphones, parallel signal paths, or layered recordings containing correlated material. Differences in phase response can affect how these signals combine.
When comparing filter slopes, use level-matched playback and listen for changes in the vocal’s tone, weight, and interaction with other tracks. The steepest setting is not necessarily the best one: choose the slope that provides sufficient low-frequency attenuation while preserving the intended vocal character.
How to Set a High-Pass Filter on Vocals: Step by Step
The following workflow provides a practical way to set an HPF based on the actual recording rather than relying on fixed frequency presets.
1. Identify the Low-Frequency Problem
Listen to the vocal and identify the source of the unwanted low-frequency energy. It may come from microphone or environmental rumble, proximity effect, plosives, or excessive bass in the recording.
If the problem occurs only during specific words or moments, avoid applying more aggressive processing to the entire track. Clip gain, targeted editing, or dedicated corrective processing may provide a more precise solution.
2. Insert a High-Pass Filter
Load an EQ or dedicated filter plugin on the vocal channel and activate its high-pass section.
Start with a moderate slope, such as 12 dB/oct, and set the cutoff low enough to preserve the fundamental frequencies and lower harmonics that contribute to the voice’s natural weight.
3. Raise the Cutoff Gradually
Slowly increase the cutoff frequency while listening to a section where the low-frequency problem is most noticeable.
Pay attention to the point at which the vocal begins to lose its natural weight or sound thinner. The objective is not to reach the highest possible cutoff, but to find a setting that controls the unwanted energy without compromising the intended vocal character.
4. Compare Different Slopes
Once the cutoff is in a suitable range, compare 6, 12, 18, and 24 dB/oct slopes, if available.
A gentler slope may provide sufficient control with a more gradual transition, while a steeper slope may be useful when stronger attenuation below the cutoff is required.
When comparing settings, keep the cutoff frequency unchanged and adjust only the slope. This makes it easier to identify how the slope affects the sound. You can then fine-tune the cutoff again if necessary.
5. Check the Vocal in the Full Mix
Return to the complete arrangement and listen to the vocal alongside the kick drum, bass, guitars, keyboards, and other instruments.
Check whether the vocal retains its body and remains naturally integrated into the mix. These decisions are part of broader vocal mixing, where placement and the relationship between the vocal and arrangement matter as much as processing individual tracks.
6. Level-Match the Comparison
Compare the filtered and unfiltered signals at approximately the same perceived loudness. Even small level differences can influence how you judge tonal changes.
If the filtered version seems better simply because it is quieter or contains less bass, the comparison may be misleading. Focus on whether the HPF actually addresses the original problem while preserving the desired vocal sound.
Common High-Pass Filtering Mistakes on Vocals
Using the Same Cutoff on Every Vocal
Different singers, microphones, performances, and arrangements require different settings. Applying the same cutoff to every vocal track ignores differences in fundamental frequencies, proximity effect, microphone response, and recording conditions.
Set the filter according to the actual audio rather than relying on a universal preset. Evaluate each vocal in the context of the arrangement and preserve the low-frequency content that contributes to its intended character.
Filtering Above the Lowest Useful Note
A high-pass filter can attenuate the fundamental frequency of a sung note when the cutoff is set too high. Depending on the filter slope and response, this can reduce the perceived weight and fullness of the performance, particularly in lower vocal registers.
Check the lowest notes in the recording before applying an aggressive cutoff. Remember that the filter does not completely remove frequencies below its cutoff; attenuation increases progressively according to its slope.
Using a Very Steep Slope by Default
A 48 dB/oct slope may look effective on an EQ display, but that does not make it the best choice for a lead vocal.
A moderate slope may provide sufficient low-frequency control while preserving a more gradual transition around the cutoff region. Use steeper filtering only when the recording requires stronger attenuation and the result remains musically appropriate.
Trying to Fix Every Plosive with an HPF
Plosives are localized events. Raising the cutoff across the entire vocal track to reduce a few problematic consonants can make the whole performance unnecessarily thin.
Use clip gain, manual editing, or dedicated de-plosive processing when the problem is limited to specific moments. These methods allow you to target individual events without changing the tonal balance of the entire recording.
Ignoring the Rest of the Processing Chain
Low-frequency energy can influence how compressors and other nonlinear processors respond. The position of the HPF in the signal chain therefore affects which stages receive the filtered signal.
For example, placing an HPF before a compressor can reduce low-frequency energy reaching its detector and input stage. This may change the compressor’s gain reduction and overall response. Filtering after compression cannot prevent unwanted low-frequency energy from influencing the compressor earlier in the chain.
The appropriate position depends on the processing goal. Compare both approaches rather than assuming that the HPF must always be the first insert.
Setting a Vocal High-Pass Filter with AFILTER
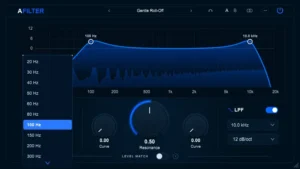 A dedicated filter plugin makes it easier to adjust the cutoff frequency, compare different slopes, and evaluate the effect of filtering without navigating through unrelated processing controls.
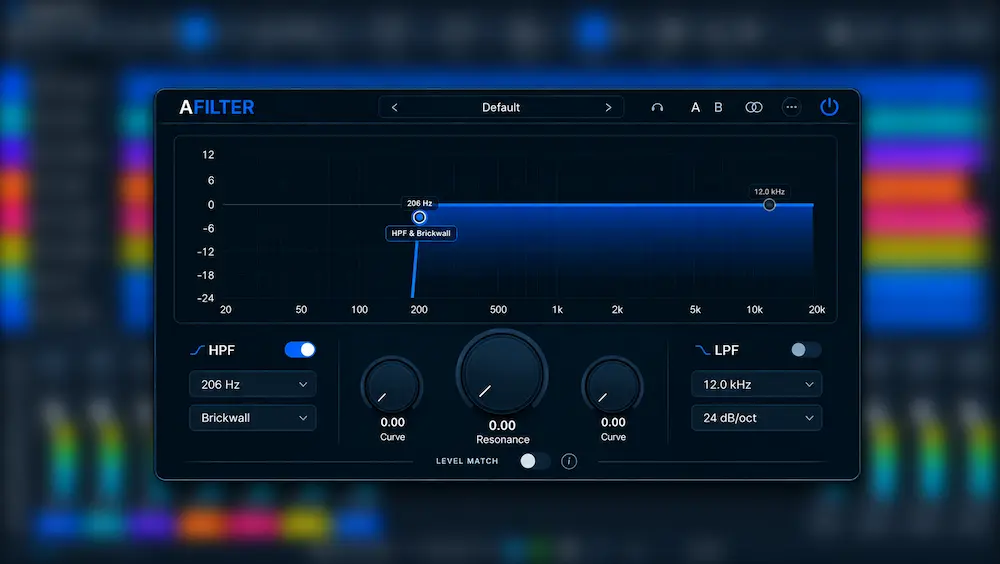
AFILTER is a free audio filter plugin developed by AREFYEV STUDIO. Its independent high-pass filter section allows you to control unwanted low-frequency content directly.
The available slope options include 12, 24, 36, 48, and 96 dB/oct, along with a dedicated Brickwall mode for extremely steep filtering.
When processing vocals, start with a moderate slope and adjust the cutoff according to the singer’s lowest notes and the unwanted low-frequency content in the recording. Try steeper settings only when a gentler slope does not provide sufficient attenuation.
AFILTER also includes several features that can help you evaluate filtering decisions:
- Independent HPF and LPF: Adjust low-frequency and high-frequency attenuation separately.
- Multiple slope options: Compare gradual and steep filter responses.
- Adjustable Resonance: Control the response around the cutoff frequency.
- Delta monitoring: Listen to the difference between the processed and original signals to assess what the filter changes.
- Level Match: Compare processed and unprocessed signals at matched levels to reduce loudness-related bias.
Delta monitoring is particularly useful when setting a vocal HPF. It helps reveal which parts of the signal are being removed or altered by the filter. This makes it easier to determine whether the processing is primarily reducing unwanted rumble or also affecting useful vocal harmonics and low-frequency body.
For a practical starting point, select a 12 dB/oct slope and gradually raise the cutoff frequency. Use Delta monitoring to inspect the affected content, then compare the filtered and unfiltered signals with Level Match enabled. Evaluate the final setting in the context of the full mix.
AFILTER is available in VST3 and CLAP formats, with an optional standalone application for 64-bit Windows.
If you need a dedicated tool for controlling vocal high-pass filtering and comparing different slopes, explore AFILTER, a free audio filter plugin.
Your Vocal Mix Is Balanced. How Does the Entire Track Translate?
Controlling the vocal low end is a matter of balance: remove too little, and unwanted rumble or excessive proximity effect can compete with the bass and other instruments; remove too much, and the voice can lose the weight and body that make it feel natural. The same principle applies to the finished mix. More processing does not automatically mean a better result, and decisions that sound right in solo may affect the balance of the entire arrangement. Before adding another processor or making further adjustments, hear what a dedicated mastering pass can reveal. Upload up to 40 seconds of your mix and receive a free mastering demo prepared by a real mastering engineer. Compare the original and mastered versions directly to assess changes in tonal balance, dynamics, low-end control, and overall translation.
Upload Your Mix and Get Your Free Mastering Demo →
Frequently Asked Questions About High-Pass Filters on Vocals
What frequency should I set a high-pass filter on vocals?
There is no universal cutoff frequency. A useful starting range may be around 40–100 Hz for many lower male voices and 80–150 Hz for many female vocals, but these values are guidelines, not fixed rules. The appropriate setting depends on the lowest sung notes, the singer’s vocal characteristics, microphone placement, and unwanted low-frequency content. Raise the cutoff gradually and stop before the vocal loses its natural body.
Should I high-pass every vocal track?
Not necessarily. Some vocal recordings benefit from low-frequency cleanup, but not every track contains problematic rumble or excessive bass. Listen to the recording and determine whether filtering provides a meaningful improvement. Avoid applying an HPF simply because it is included in a standard vocal mixing template.
What is the best high-pass filter slope for vocals?
A 12 dB/oct slope is a useful starting point for general vocal cleanup. An 18 or 24 dB/oct slope may be more appropriate when stronger low-frequency attenuation is required. Choose the slope according to the source material, the amount of unwanted energy, and the desired tonal result.
Should I use a 48 dB/oct high-pass filter on vocals?
A 48 dB/oct slope can be useful for specialized filtering tasks, but it is often unnecessarily steep for routine lead vocal processing. Compare it with gentler slopes and listen for changes in vocal weight and tonal balance. Also consider the filter’s phase response, particularly when processing multiple microphones or parallel signal paths.
Can a high-pass filter remove the proximity effect?
An HPF can reduce the additional low-frequency energy associated with the proximity effect, but eliminating it completely may also remove some of the natural body of the voice. If the vocal becomes too thin, try a low-shelf filter or a more targeted EQ adjustment.
Should the high-pass filter go before or after the compressor?
It depends on the processing goal. Placing the HPF before the compressor can reduce low-frequency energy reaching both the compressor’s input and detector, potentially changing its response. Placing it after compression allows the compressor to respond to the original signal, including its low-frequency content. Compare both positions in the context of the mix.
Can a high-pass filter make vocals sound thin?
Yes. If the cutoff is too high or the slope is too steep, the filter can attenuate fundamental frequencies and lower harmonics that contribute to the perceived weight and warmth of the voice. Lower the cutoff, choose a gentler slope, or use a low-shelf filter if you need more selective control.
Is a high-pass filter the same as a low-cut filter?
Yes. High-pass filter and low-cut filter are two names for the same type of processing. Both describe a filter that attenuates frequencies below a selected cutoff region while allowing higher frequencies to pass.
Final Thoughts: How to High-Pass Vocals Without Losing Body
A high-pass filter is a useful tool for controlling unwanted low-frequency energy in vocal recordings. It can reduce rumble, control excessive proximity effect, and prevent unnecessary low-frequency buildup in a mix.
However, the best vocal HPF setting is not the highest possible cutoff or the steepest available slope. It is the setting that addresses the specific problem while preserving the fundamental frequencies, lower harmonics, and natural character of the performance.
Start with a moderate slope, raise the cutoff gradually, and evaluate the result in both solo and full-mix contexts. If the vocal begins to sound thin, lower the cutoff, try a gentler slope, or consider a more targeted EQ approach.
Effective vocal filtering is not about removing as much low-frequency energy as possible. It is about controlling what interferes with the mix while preserving everything that contributes to the weight, clarity, and character of the voice.

When evaluating high-pass filtering on vocals, the key is distinguishing unwanted low-frequency interference from the fundamental frequencies and lower harmonics that define the voice’s weight. Cutoff frequency and filter slope should be considered together, with attention to phase response and how the vocal interacts with the rest of the arrangement. The objective is controlled low-end energy without sacrificing the natural character of the performance.
Enjoyed this review?
If you found it useful, you can support independent audio research with a coffee. ☕
Buy me a coffee